Most people who want to make kimchi at home don’t quit because the recipe is hard. They quit because nobody tells them what “done” looks like. How much salt is right, how long the cabbage sits, whether that jar bubbling on the counter is fermenting properly or turning into something you should throw out. I grew up with kimchi on the table at every meal, and I’ve made enough bad batches in my own kitchen to know exactly where a first-timer goes wrong. What follows is the whole process — salting, seasoning, packing, fermenting, storing — with the judgment calls spelled out, so you can tell at each step whether you’re on track or need to adjust.

Kimchi at Home Is Easier Than You Think — Here’s the 5-Step Map
A batch of kimchi takes about 90 minutes of actual work, spread across a day, plus two to five days of waiting where you do nothing at all. That’s the whole commitment. It feels bigger than that because the waiting is unfamiliar — you’re leaving food out on the counter on purpose, which runs against everything an American kitchen teaches you.
Here’s the shape of it, start to finish:
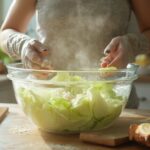
- Salt the cabbage. Cut napa cabbage, salt it, let it sit for a few hours. The salt pulls water out and makes the leaves pliable. This step decides more about your final kimchi than any other.
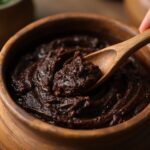
- Make the seasoning paste. A cooked rice-flour porridge, gochugaru (Korean red pepper flakes), garlic, ginger, fish sauce, and something sweet like Asian pear. Ten minutes of work, plus cooling time.
- Mix and pack. Rinse the salted cabbage, coat it with paste, press it into a jar so the brine covers everything.
- Ferment on the counter. One to five days at room temperature, depending on how warm your kitchen is. This is where the lactic acid bacteria go to work and where sourness develops.
- Move it to the fridge. Cold slows fermentation to a crawl. From there your kimchi keeps changing, just slowly — and for most people it gets better over the first few weeks.
Only steps 1 through 3 involve your hands. Steps 4 and 5 are a matter of knowing what to look for, which is exactly the part most recipes gloss over.
A few things worth knowing before you start. You don’t need a fermentation crock, an airlock, or a kimchi refrigerator — a clean glass jar works. You don’t need a scale, though one makes the salting step easier, and I’ll give you a fallback if you don’t have one. And you can’t really rush this: the timeline is set by biology, not by technique. Warm kitchen, faster ferment. Cool kitchen, slower and usually more complex.
If you’re reading this at 6 p.m. hoping to eat kimchi tonight, this isn’t the recipe for you — try instead, which is ready in about 30 minutes and requires no fermentation at all. But if you can give it a weekend, the napa cabbage version is the one worth learning. It’s the kimchi my grandmother made every fall, in quantities that filled the back porch, and the process hasn’t changed much since.
What You Actually Need: Ingredients and Substitutions
Six ingredients do the real work; everything else is adjustment. If you understand what each one is for, you can walk into any grocery store, see what’s missing, and make a smart call instead of abandoning the project. That’s the difference between following a recipe and actually cooking.
The 6 Non-Negotiables
Napa cabbage (about 2 lbs, one medium head). The loose, frilly structure is the point — the layers hold seasoning between them, and the thick white stems stay crisp while the leaf tips go soft. That contrast is most of what people like about good kimchi.
Coarse sea salt (roughly ½ cup for a 2 lb head — see the salting section for how to measure this properly). Salt does two jobs: it draws water out of the cabbage so the texture firms up, and it selects for the microbes you want. Salt-tolerant lactic acid bacteria survive it; a lot of spoilage organisms don’t. It’s the oldest food-preservation principle there is, and it’s why kimchi keeps for months instead of days.
Gochugaru — Korean red pepper flakes. Buy the coarse-ground kind sold for kimchi. It gives color, moderate heat, and a fruity note that chili powder doesn’t have. This is not a substitution point, and I’ll explain why below.
Garlic (8–10 cloves, minced) and ginger (a thumb-sized piece). Sharp and pungent going in, mellowing as the kimchi ages. Go heavier on garlic than feels reasonable — it fades.
Fish sauce or salted shrimp (¼ cup fish sauce, or 2 tablespoons saeujeot, Korean salted fermented shrimp). This is your savory depth, the umami backbone. It also brings its own enzymes and salt to the ferment.
Sweet rice flour (2 tablespoons, cooked into a thin porridge with a cup of water). This is the one ingredient beginners skip and shouldn’t. The starch gives the lactic acid bacteria something to eat early on, and it helps the paste cling to the leaves instead of sliding off into a puddle at the bottom of the jar.
Optional but common: Korean radish or daikon cut into matchsticks, scallions, and a grated Asian pear for sweetness. My grandmother always added pear. I do too.
Substitutions That Work (and Two That Don’t)
Salt. If kosher salt is what you have, use it — but weigh it, or at least account for the difference. Diamond Crystal kosher salt is much less dense than coarse sea salt, so a cup of it contains noticeably less sodium than a cup of sea salt. Table salt is the opposite problem: dense, and often iodized. Iodine can inhibit some bacterial cultures, and anti-caking agents can cloud your brine. Plain, non-iodized salt is what you want.
Fish sauce. Vegan, or allergic to shellfish? Soy sauce plus a spoonful of white miso gets you close on savoriness, and a small piece of dried kelp simmered into the rice porridge adds more. It won’t taste identical — fish sauce has a specific funk — but it makes genuinely good kimchi. Full method in .
Asian pear. A Bosc pear or a sweet apple works. Use about half as much apple as you would pear; apples are sweeter and can push the ferment fast.
Napa cabbage. Regular green cabbage will ferment, but it’s denser and holds less water, so the texture comes out tougher and the paste doesn’t penetrate the same way. Acceptable in a pinch, not the same dish.
Now the two that don’t work. Gochujang is not a substitute for gochugaru. It’s a fermented paste containing sugar, soybean, and rice — dumping it in makes a sticky, overly sweet kimchi that ferments unpredictably. If you can’t find gochugaru locally, order it online rather than improvising. And the chili powder in the spice aisle is not gochugaru — American chili powder is usually a blend with cumin and oregano in it, which tastes distinctly wrong here. Plain cayenne is too hot and too fine, though a mix of paprika and a little cayenne is a passable emergency stand-in for color and mild heat.
Equipment: A Jar, a Bowl, Gloves
You need a large bowl, a clean glass jar with a lid (a 2 lb head of cabbage fits comfortably in a half-gallon jar), and disposable gloves. The gloves aren’t optional in practice — gochugaru gets under your fingernails and stays there, and if you touch your face afterward you’ll regret it.
A kitchen scale helps with the salting step but isn’t required. Everything else — the crocks, the airlocks, the specialized kimchi containers — is a convenience for people making twenty pounds at a time, not a requirement for your first jar.
The Five Steps, Start to Finish
Step 1: Salting the Cabbage — The Ratio That Decides Everything
Use salt equal to about 5–8% of your cabbage’s weight, and let it sit 2 to 4 hours. For a 2 lb head, that’s roughly 50–70 grams of coarse sea salt — about ⅓ to ½ cup, depending on your salt’s density. Get this right and everything downstream is forgiving. Get it wrong and no amount of good gochugaru will save the batch.
Here’s why the number matters. Salt concentration decides which microbes get to grow in your jar. The Codex Alimentarius standard for kimchi, published jointly by the FAO and WHO, describes kimchi as a product prepared by salting napa cabbage and then fermenting it under controlled low-temperature conditions — the salting isn’t a seasoning step, it’s the selection step. Too little salt and you’ve built a hospitable environment for organisms you don’t want, which shows up as mush and off smells. Too much and the lactic acid bacteria get suppressed too, so fermentation stalls and you end up with salty raw cabbage instead of kimchi.
How to Actually Do It
Cut the cabbage lengthwise into quarters, leaving the core attached so the leaves stay together. Rinse under cold water, then work from the outside in, sprinkling salt between every layer — heaviest on the thick white stems near the base, lightest on the leafy tips. The stems are dense and need more; the leaves wilt fast.
Lay the quarters cut-side up in a large bowl and let them sit. Every hour, rotate them, bottom pieces to the top. The ones sitting in the brine that collects will salt faster than the ones on top. In a warm kitchen, 2 hours may be enough. In a cold one, go closer to 4.
The Bend Test: How to Tell When It’s Done
No scale, no thermometer, no problem. Take a thick white stem from the base of a quarter and bend it. If it snaps, keep going. If it bends into a U without breaking — flexible like a piece of wet leather — the cabbage is ready. The leafy tops should look translucent and limp. The cabbage will also have shrunk noticeably and released a good amount of liquid into the bowl.
Taste a piece of stem. It should be pleasantly salty, like a well-seasoned soup, not aggressively briny. That’s your second check.
Rinsing: The Step With Real Consequences
Rinse the salted cabbage three times in cold water, then drain it in a colander for at least 20 to 30 minutes. This is where I see the most avoidable mistakes.
Rinse too little and the finished kimchi is inedibly salty — and unlike a soup, you can’t dilute it after the fact. Rinse too much and you’ve washed away the salt that was supposed to protect the ferment, which invites the wrong microbes and can leave you with a soft, slimy result. Three rinses, squeezing gently, is the reliable middle.
The draining matters as much as the rinsing. Water clinging to the leaves dilutes the seasoning paste and the brine, which lowers the effective salt concentration in your jar. Give it the full half hour. If you’re in a hurry, press the quarters gently between your palms — gently, because bruised leaves break down faster during fermentation.
One practical note about timing: salting anchors your whole day. Start it in the morning and you’ll be packing jars by early afternoon. Start it after dinner and you’ll be mincing garlic at eleven at night, which is how a fun project turns into a chore you don’t repeat.
Step 2: Building the Seasoning Paste
Make the paste while the cabbage is salting, and make the rice porridge first so it has time to cool. That’s the whole scheduling trick. The order matters for one non-negotiable reason: hot porridge will scald the garlic and can damage the microbial cultures you want in the jar, so it has to come down to room temperature before anything else joins it.
Start With the Porridge
Whisk 2 tablespoons of sweet rice flour into 1 cup of cold water in a small saucepan. Bring it to a simmer over medium heat, stirring constantly, and cook for about 3 to 5 minutes until it thickens into something like a thin gravy — it should coat a spoon but still pour. Stir in a teaspoon of sugar off the heat if you want; it dissolves better while warm.
Then set it aside and let it cool completely. Twenty minutes on the counter, or ten in the fridge if you spread it in a shallow bowl. Warm to the touch is fine. Steaming is not.
Sweet rice flour, sometimes labeled glutinous rice flour or mochiko, isn’t the same as regular rice flour. If regular rice flour is all you can find, it works — the porridge just comes out slightly less sticky. In a real pinch, a few tablespoons of cooked white rice blended smooth with water does the same job. Korean cooks have used leftover rice this way for a very long time.
Then Build the Rest In
Into the cooled porridge, add:
- 1 cup gochugaru. Let it sit for 10 minutes before adding anything else. The flakes absorb the moisture, swell, and release their color — the paste goes from patchy orange to deep, even red. Skip this rest and your kimchi looks dusty instead of glossy.
- 8–10 cloves garlic, minced or grated fine.
- 1 tablespoon grated ginger. Less than you think. Ginger is assertive and it doesn’t mellow the way garlic does.
- ¼ cup fish sauce (or the soy-and-miso substitute).
- ½ Asian pear, grated on the large holes of a box grater. The sugars feed the ferment early and round out the raw edge of the garlic.
Stir it into a thick, spreadable paste — closer to tomato paste loosened with a little water than to a sauce. If it’s too stiff to spread, add a tablespoon of water at a time. If it’s runny, it’ll slide off the leaves and pool at the bottom of your jar.
Fold in your vegetables last: a couple of cups of Korean radish or daikon cut into thin matchsticks, and a handful of scallions cut into 2-inch lengths. They stay crunchy through the ferment and give you something to bite against the soft cabbage.
Taste It Now, Not Later
Take a small spoonful. It should taste slightly too strong on its own — a little too salty, a little too garlicky, a little too sharp. That’s correct. Spread across two pounds of rinsed cabbage and given a few days to ferment, all of it softens considerably. Paste that tastes perfectly balanced straight from the bowl will produce bland kimchi.
The other thing to check is heat. Gochugaru varies a lot by brand and grind — some is barely warm, some has real bite. Taste before you commit to the full cup, and adjust. There’s no rule that kimchi has to be aggressively spicy; plenty of Korean households make it mild.
If you’d rather make the paste in advance and use it across several batches, it keeps in the fridge for a few days — details in . But the clock starts once the fish sauce and pear go in. This isn’t a shelf-stable condiment.
Step 3: Mixing and Packing the Jar
Coat every leaf individually, then pack the jar to about 80% full and press until the brine rises above the cabbage. Those two things — full coverage and full submersion — separate kimchi that ferments cleanly from kimchi that grows mold on top. Everything else in this step is technique you’ll get better at with practice.
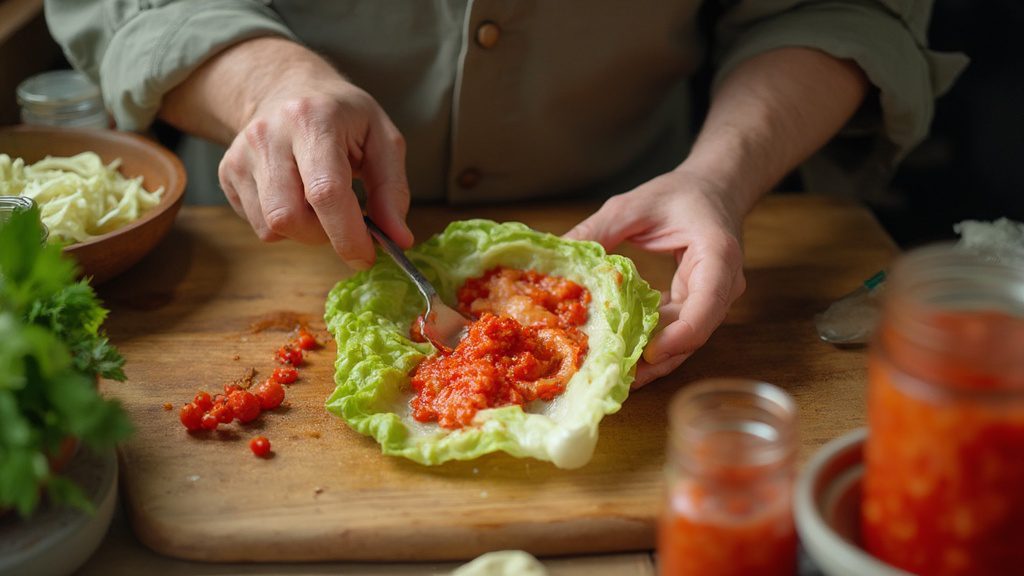
Put your gloves on. Lay a quarter of drained cabbage in a wide bowl or on a sheet pan, cut-side up, and hold it at the core so the leaves stay together. With your other hand, take a scoop of paste and smear it between the layers, working from the innermost leaves outward. Push the paste down toward the thick white base of each leaf — that’s the part that needs the most seasoning and the part most people under-cover, because it takes effort to get in there.
You want a thin, even film, not a thick blanket. Two pounds of cabbage doesn’t need a heroic quantity of paste; if you’re running out halfway through, you’re using too much per leaf. When the quarter is coated, fold the leafy top half back toward the base to make a compact bundle, and wrap the outermost leaf around it to hold everything in place. My grandmother did this without looking, talking the whole time. It took me years to stop making a mess of it.
Packing: Press Harder Than Feels Right
Set each bundle into the jar cut-side up, pressing down firmly with your fist as you go. Firmly. The goal is to drive out trapped air pockets, and air pockets are where things go wrong — they give mold and unwanted yeasts a place to establish while the lactic acid bacteria are still getting started.
Stop at about 80% of the jar’s height. That headspace isn’t optional. Fermentation generates carbon dioxide, and the brine level rises as the cabbage releases more liquid. Fill to the brim and you’ll come back to a jar that has bubbled over onto the counter — and if you’ve ever cleaned dried kimchi brine off a countertop, you only do it once.
Scrape the last of the paste from your bowl, add a splash of water to catch what’s stuck, and pour that over the top. Then press down one more time with a clean spoon or your gloved fist until liquid rises and covers the surface of the cabbage.
Why Submersion Matters
Below the brine, conditions are low-oxygen, which is exactly what the lactic acid bacteria driving this fermentation prefer. Above the brine, exposed to air, you’ve created a surface where molds and film yeasts can grow. This is a general principle of vegetable fermentation, not something specific to kimchi — the U.S. Department of Agriculture’s home canning and pickling guidance makes the same point about keeping fermenting vegetables submerged under their brine.
If your cabbage keeps floating up, weigh it down. A small glass jar filled with water works. So does a clean, folded outer cabbage leaf laid over the top and tucked down at the edges, which is the traditional approach — the leaf takes the surface exposure so the kimchi underneath doesn’t.
Wipe the inside rim of the jar with a clean paper towel before closing it. Paste smeared on the glass above the brine line dries out and can go moldy, and it’s the first thing you’ll notice on day three and worry about unnecessarily.
Close the lid, but don’t crank it down. Gas needs somewhere to go. Snug is right; airtight is a mess waiting to happen.
Then put the jar on a plate or in a shallow bowl and set it on the counter. The plate catches overflow. You will need the plate.
Step 4: Fermentation — Time, Temperature, and How to Read the Jar
Leave the jar at room temperature for one to five days, then move it to the fridge. The range is that wide because temperature, not the calendar, controls the pace. A 75°F kitchen in August will get you there in a day or two; a 65°F kitchen in January might take four or five. Stop counting days and start reading the jar.
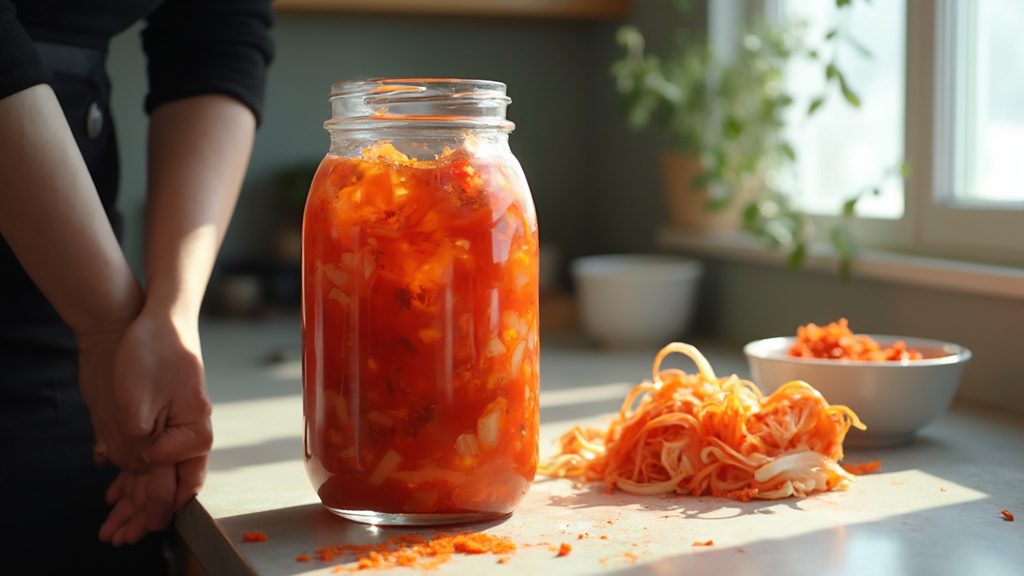
Three signals tell you fermentation is underway: bubbles, sourness, and rising brine. Small bubbles cling to the glass and rise when you press the cabbage down. The smell shifts from raw garlic and pepper toward something tangy and yeasty. And the liquid level climbs as the cabbage keeps releasing water and the bacteria produce carbon dioxide.
Open the jar once a day. Press the cabbage back under the brine with a clean spoon, let the built-up gas escape, and taste a small piece. That daily taste is the real instrument here — no thermometer or pH strip will tell you as much as your own mouth about when the kimchi has reached the sourness you like.
Day 1 to Day 5: What You’ll See and Smell
Day 1. Not much. The jar looks like what you packed. The cabbage tastes like seasoned raw cabbage — spicy, salty, sharp with garlic. The brine may have risen slightly.
Day 2. First bubbles, usually along the glass. Press down and you’ll see them stream upward. The smell has a faint sour edge underneath the pepper. The taste is still mostly fresh, with a hint of tang at the back.
Day 3. This is where most kitchens in the 68–72°F range hit the sweet spot. Active fizzing when you press. Distinctly sour, but still bright and crisp — just past what Koreans would call geotjeori, fresh kimchi. Plenty of people stop here and refrigerate.
Day 4–5. Sourness deepens, the raw garlic bite recedes, and the cabbage softens. The brine turns cloudy — normal, and a sign the bacteria are thriving rather than a problem. If your kitchen runs cool, this is often your moment.
There’s no wrong answer among these. In Korean home cooking, the same batch gets eaten at different stages for different purposes, and preferences vary house to house. My mother refrigerated at day two. My grandmother went longer.
Fermented vs. Spoiled: How to Tell
Fermenting normally looks like: cloudy brine, bubbles, a sour smell that’s tangy and appetizing, and sometimes a thin white film on the surface. That white film is kahm yeast — harmless, common in vegetable ferments, and easily skimmed off. It shows up where kimchi has been exposed to air, which is the argument for keeping everything submerged.
Spoiled looks like: fuzzy growth in any color — green, black, pink, blue. Mold has texture and structure; kahm yeast is a flat, wrinkled skin. If you see fuzz, don’t scoop around it. Unlike a hard cheese, a soft, wet, high-moisture food like kimchi lets mold send filaments well past what you can see. The USDA’s guidance on moldy foods is direct about this: soft foods with visible mold should be discarded rather than trimmed.
Other reasons to throw it out: a smell that’s putrid or rotten rather than sour, slimy or ropy brine that strings when you lift a spoon, or cabbage that’s gone to mush. Sour is good. Rotten is not, and your nose knows the difference without any help from me.
One thing that trips people up: kimchi smells strong. That’s not a defect. A jar of properly fermenting kimchi will announce itself when you open the fridge, and it can be genuinely startling the first time. Sour and pungent is the destination, not a warning sign.
When to Move It to the Fridge
The moment it tastes the way you want it. Cold doesn’t stop fermentation, but it slows it enough that the flavor holds roughly where you left it, drifting sour over weeks instead of hours.
Err on the early side. Kimchi keeps getting more sour in the fridge, so refrigerating at the exact sourness you want means it’ll be past that point in two weeks. Pull it slightly younger than your ideal and let the cold do the rest. That’s the single adjustment that most improved my own batches.
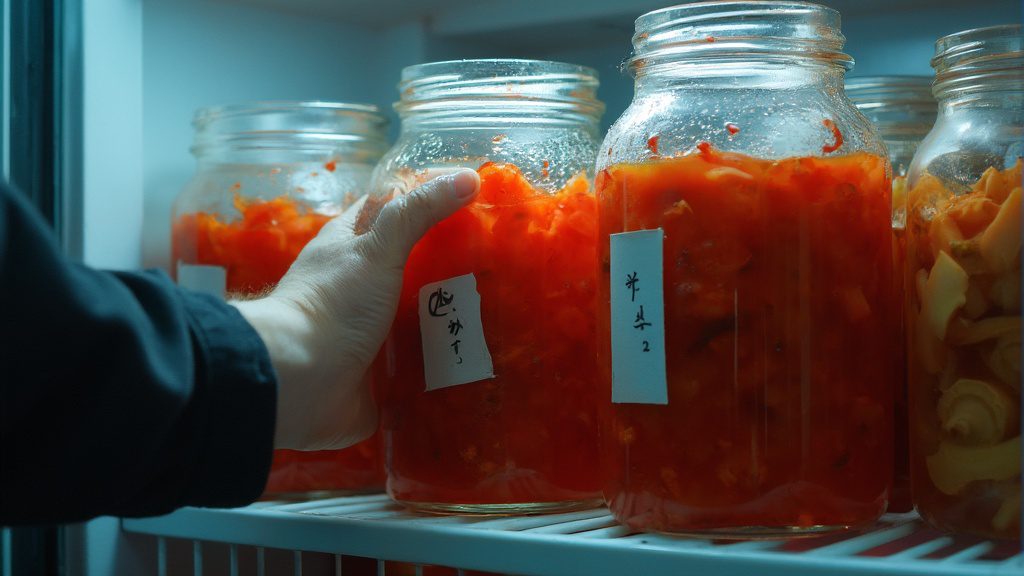
From My Kitchen: What I Got Wrong in My First Ten Batches
Growing up eating something every day teaches you nothing about making it. I watched my grandmother do this for years and still turned out a run of genuinely bad kimchi when I started making it in my own apartment. Here’s what went wrong, and the rule I use now to keep it from happening again.
Batch one: too much salt, and I couldn’t undo it. I salted generously because generous felt safe, then rinsed twice instead of three times. The result was so salty I could only eat it a few shreds at a time, mixed into rice. There’s no correction after the fact — you can’t rinse finished kimchi. My rule now: taste a piece of stem after rinsing, before the paste goes on. If it’s too salty then, it will be too salty forever. Rinse again.
Batch three: too little salt, and it turned to mush. Overcorrecting from batch one, I went light and cut the salting time short. Four days later the cabbage had no structure left — soft, slippery, faintly off. My rule now: the bend test isn’t optional. If a thick stem snaps instead of folding, the cabbage isn’t ready, no matter what the clock says.
Batch four: I moved it to the fridge too early. I got nervous. The jar was bubbling, the smell was strong, and I assumed something was going wrong. What I actually had was a fermentation just getting started, and I stopped it before any real flavor developed. It sat in my fridge tasting like spicy salad for two weeks. My rule now: bubbles and a strong smell are the process working. Wait for actual sourness on your tongue.
Batch six: bad gochugaru. I bought whatever red pepper flakes the store had. The kimchi came out dull brown instead of red, with a flat, dusty flavor. Gochugaru varies enormously — by harvest, by grind, by how it was dried. Sun-dried Korean gochugaru costs more, and it shows up in both color and taste. My rule now: buy from a Korean grocery or a specialty importer, and don’t get the biggest bag until you’ve tried a small one.
Batch seven: I thought it had gone bad when it had simply aged. Three weeks in the fridge, it had turned sharply sour and the brine was cloudy. I threw the whole jar out. That was a mistake — what I had was well-fermented kimchi, exactly the kind Korean cooks prize for stews. American refrigerator logic had trained me to read “changed” as “spoiled.” My rule now: sour is a stage, not a failure. Fuzz, sliminess, and a putrid smell are failures. Nothing else is.
Batch nine: I finally weighed the cabbage. I’d been eyeballing salt for eight batches, which meant every jar was a different experiment with no control. A $12 kitchen scale turned kimchi from a gamble into a process. That’s when my results got consistent, and honestly, that’s when I started enjoying making it.
The pattern across all of these is the same: I was following steps without knowing what each step was supposed to accomplish, so when something looked unfamiliar I either panicked or guessed. That’s the gap this whole article is trying to close. My grandmother never measured anything, but she’d been reading cabbage with her hands since she was a child. The rest of us need the numbers first. The instinct comes later.
Storing, Aging, and Eating Your Kimchi
Kept cold and submerged, homemade kimchi stays good for three to six months, and it keeps changing the entire time. That’s the part American kitchen instincts don’t prepare you for — this isn’t a food with a single peak followed by decline. It’s a food with stages, and Korean cooking uses all of them.
Keep it in the fridge in a container with a tight-fitting lid, and use a clean utensil every single time. That’s the whole storage protocol. The one habit worth building: after you take some out, press the remaining kimchi back down under the brine with the spoon. Exposed surfaces are where problems start, and thirty seconds of pressing prevents most of them.
A few practical notes. Glass or food-grade plastic both work; the plastic will stain red and hold the smell permanently, so use a container you’ve retired to this purpose. Don’t fill to the rim — fermentation continues slowly even at refrigerator temperature, and pressure still builds. And keep it sealed unless you want everything in your fridge to taste faintly of kimchi. That’s a real phenomenon, and it’s why Korean households often own a dedicated kimchi refrigerator. Full storage detail in .
The Stages, and What Each One Is For
Week 1 — fresh and crisp. Bright, lightly sour, still crunchy. Eat it as a side dish, straight from the jar alongside rice. This is also when it’s best in a lettuce wrap or chopped over a rice bowl.
Weeks 2 to 4 — the middle. For most people this is the peak. Sourness has developed, the garlic has integrated, and the texture still has bite. Good on its own, good cooked.
Month 2 and beyond — properly sour. Sharply acidic, softer, deeply savory. Raw, it’s a lot. Cooked, it’s the best kimchi you’ll ever have.
That last point matters. Sour kimchi isn’t spoiled kimchi and it isn’t failed kimchi — in Korean cooking it’s a distinct ingredient with its own name, muk-eun-ji, aged kimchi, and cooks pay more for it. The acidity that makes it hard to eat straight is exactly what makes it work in a hot pan. Heat mellows the sourness and concentrates the savoriness.
So when your jar turns sharply sour in month two, you haven’t lost anything. You’ve been promoted from a side dish to a cooking ingredient. Kimchi jjigae — a bubbling stew of sour kimchi, pork or tofu, and its own brine — is the classic destination, and it genuinely requires old kimchi to taste right ( ). Kimchi fried rice is the other standby. Both are weeknight dishes in Korean homes precisely because there’s always a jar that’s gotten ahead of you.
About the Brine — Don’t Pour It Out
The liquid in the jar is worth keeping. It’s seasoned, acidic, and full of what the fermentation produced, and Korean cooks use it as a base for stews, a splash in cold noodle broth, or part of a marinade. When you finish a jar, that brine goes into the next dish, not down the drain.
One honest note on the health side, since people ask: fermented vegetables like kimchi contain live lactic acid bacteria, and research on fermented foods and the gut microbiome is an active and genuinely interesting area. But the amount and type of bacteria in any given jar varies enormously with your salt, your temperature, and your timeline, and cooking kimchi kills the live cultures. If gut health is your reason for making this, eat some of it raw, and hold your expectations loosely — the science here is promising and still developing, not settled.
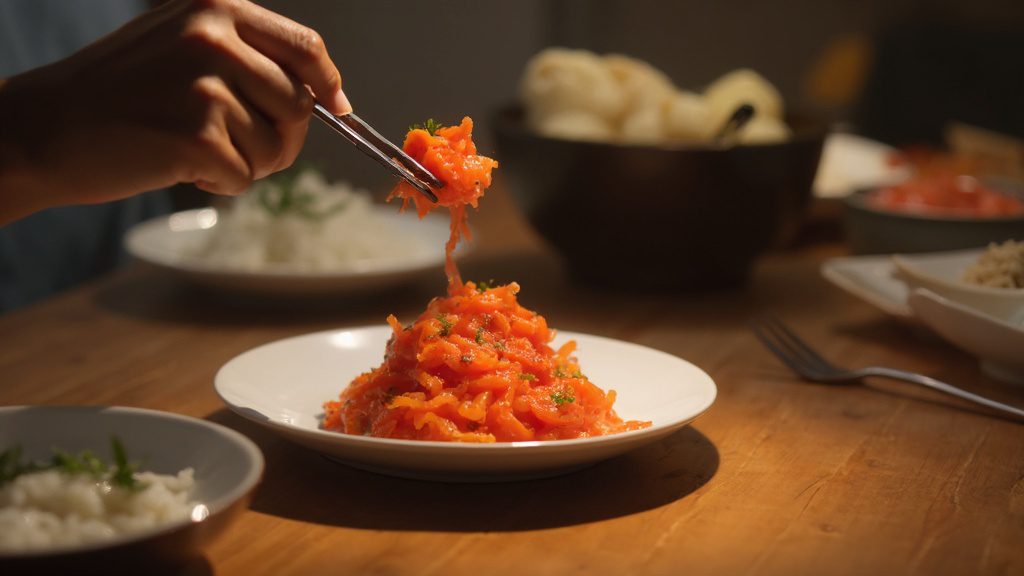
Kimchi FAQ: Salt, Timing, and Substitutes
A few questions come up again and again, usually from people standing in their kitchen mid-batch wondering if they’ve ruined something. Short answers first.
How long does it take to make kimchi at home?
About 90 minutes of hands-on work, plus 2 to 5 days of fermenting. Those are two very different kinds of time, and it helps to separate them.
The hands-on portion breaks down roughly as: 20 minutes cutting and salting, 15 minutes making the paste while the cabbage sits, 30 minutes rinsing and draining, and 20 to 25 minutes coating and packing. The salting itself adds 2 to 4 hours of waiting, but you’re not doing anything during it.
Then the jar sits on your counter for a few days. Total elapsed time from cabbage to first bite is typically three to four days. First-timers should budget closer to two hours of active work — everything is slower the first time, especially coating the leaves.
Can I make kimchi without fish sauce?
Yes, and it ferments perfectly well. Fish sauce contributes savory depth, not the fermentation itself — that job belongs to the salt, the cabbage’s own bacteria, and the sugars in the paste.
Replace ¼ cup of fish sauce with about 3 tablespoons of soy sauce plus 1 tablespoon of white miso, and simmer a 2-inch piece of dried kelp in the rice porridge for extra depth. Dried shiitake mushrooms, soaked and finely chopped, add another layer. The result tastes cleaner and less funky than the fish-sauce version — different, not lesser. Some people prefer it. The full method is in .
Why is my kimchi not bubbling?
Check three things, in this order: temperature, salt, and time. Cold is the most common culprit — below about 60°F, fermentation slows to the point where you may see almost nothing for days. Move the jar somewhere warmer, like on top of the refrigerator or near (not on) a heat source.
Too much salt is the second possibility. If the cabbage tasted aggressively salty going in, the bacteria are suppressed and things will crawl. There’s no fix mid-batch, but it will eventually ferment — give it more time and more warmth.
Third, you may simply be early. Day 1 often shows nothing at all. Before concluding anything is wrong, press the cabbage down with a spoon and watch for bubbles rising through the brine; they’re often there before you can see any activity at the surface. And taste it. A faint sour edge means it’s working even if the jar looks still.
Can I use regular green cabbage instead of napa?
You can, but expect a different dish. Green cabbage ferments fine — the microbes don’t care — but the texture and the seasoning distribution both change.
Green cabbage is denser and lower in water, so it stays crunchy longer and doesn’t wilt into the soft-tipped, crisp-stemmed contrast napa gives you. The tight head also means the paste can’t get between layers the way it does with napa’s loose, frilly structure. Practical workaround: cut green cabbage into rough 1- to 2-inch squares instead of leaving quarters intact, then toss everything together so each piece gets coated. Cut your salting time by about a third, since there’s less water to draw out.
This is essentially how mak-kimchi — “roughly made” kimchi, cut into pieces rather than kept whole — is put together in Korean homes, and nobody considers it a compromise. It’s just a faster format.
If you take one thing from all of this, I hope it’s that making kimchi at home is less about precision than about learning to read the jar. Salt the cabbage until the stem bends instead of snapping. Give the paste time to bloom. Pack it down so the brine covers everything, then let temperature do the rest — warm and fast, or cool and slow, whichever suits your kitchen. The signals I described are the same ones I still use, and they’ve served me better than any stopwatch. My honest suggestion is to start with a single head of napa cabbage rather than a big batch. A small first jar teaches you what “ready” tastes like in your own kitchen, and it costs you very little if it turns out sourer than you expected. Once you’ve made one, the second one stops feeling like a test. And if you have a specific health question about fermented foods and your own situation, that’s a conversation worth having with your own physician, who knows your history — what I can offer here is the process, and the judgment to go with it.
Related reading